

Notice
This Item is Out of Stock
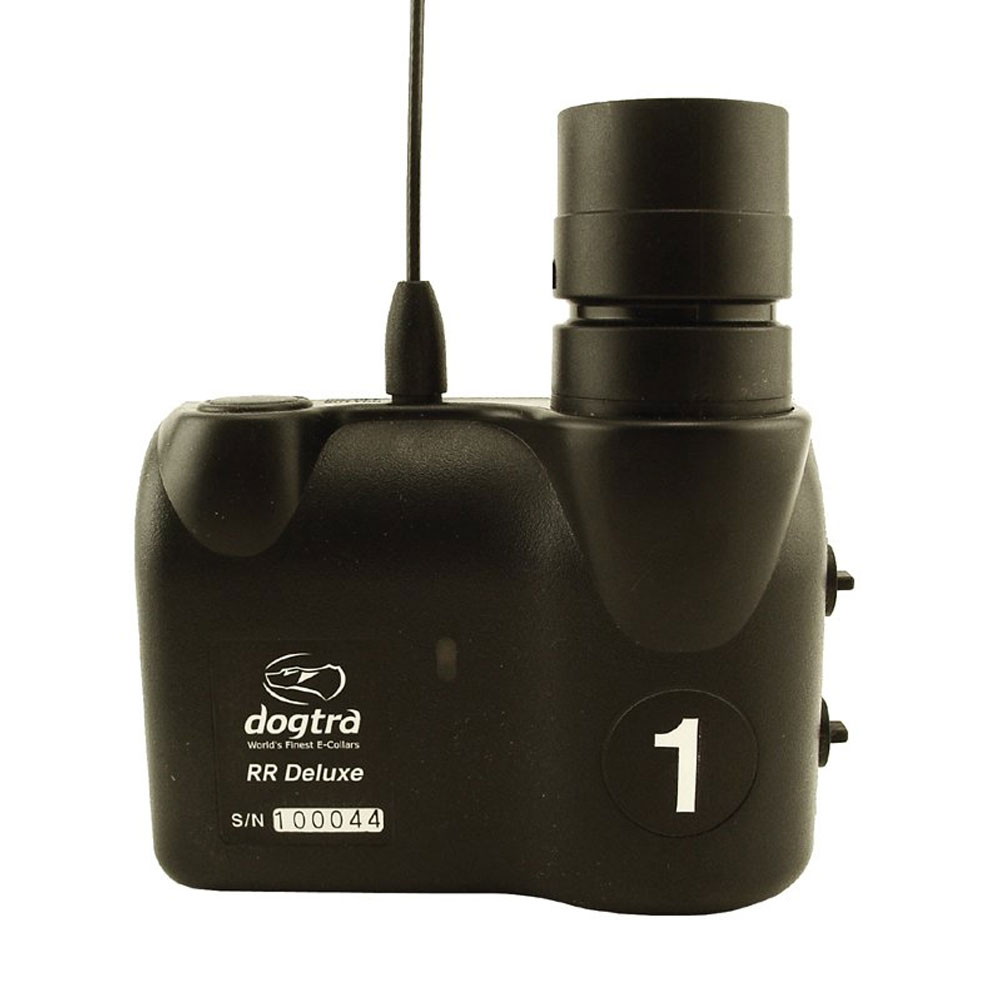
Description
Dogtra RR Deluxe Additional Receiver can be used to replace lost or damaged units, or to expand your existing RR Deluxe Remote Launcher. The RR Deluxe remote launching system is able to operating up to 8 receivers from each transmitter. The RR Deluxe Receiver can operate 1 or 2 launchers when used with the additional 50 ft jumper cord (not included). This allows you to operate up to 16 launcher with 1 remote transmitter.
Works with Dogtra Model:
- RR Deluxe Bird Launching System
Useful Information
View Dogtra RR Deluxe Remote Release Bird Launchers Owner's Manual.
Assembly
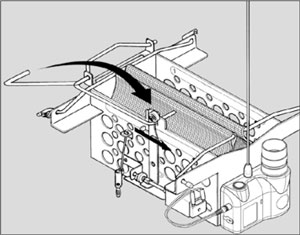
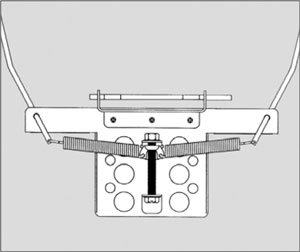
Figure 1. Mounting the receiver
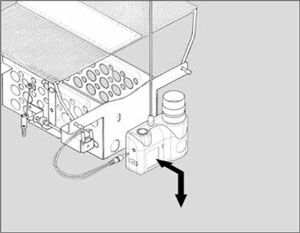
To mount the receiver, attach the receiver to the launcher box and push down gently so that it locks in place. Check to see whether the receiver is attached securely by gently pulling on the receiver.
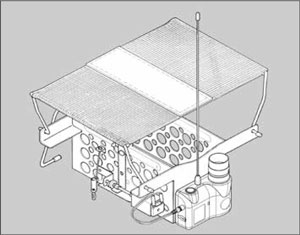
Figure 2. Plugging solenoid cable into the receiver
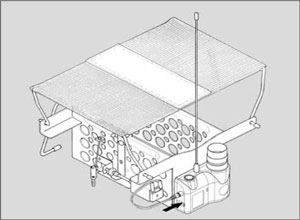
Plug the solenoid cable into the receiver's left jack.
Assembly for Two Launchers
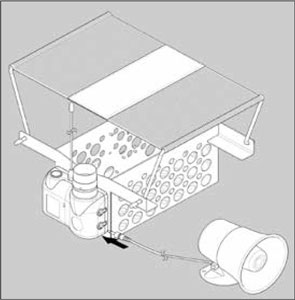
Figure 3. Assembling two launchers on one receiver
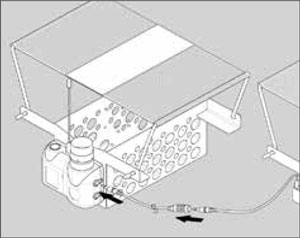
- Mount the receiver to the launcher.
- Plug the solenoid cable into the receiver's right jack. The other receiver will be plugged into the receiver's left jack. A 15-foot extension cable can be purchased separately.
How to launch the Dogtra Remote Release BirdLaunchers
First, test the launcher without any dummy or bird inside.
WARNING! Keep your head away from the top of the launcher when it is loaded. You could be injured if the dummy or bird is launched accidentally.
Figure 4. Closing the launcher
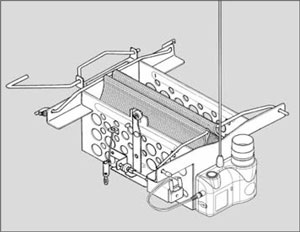
Close the launcher mesh inside of the launcher basket and hold it in place with the release lever.
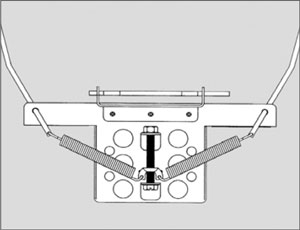
Figure 5. Setting the latch
Place the release lever under the latch roller bearing.
Turn the receiver on and make sure that the safety pin has been pulled out.
Figure 6. Remote launcher released
Press the transmitter's left or right launcher button depending on which jack (left or right) it's connected to. The remote launcher is working properly if the bird cradle pops open like the diagram above.
Press the transmitter's Beeper button or Duck Call button. You'll know it's working properly if the receiver sound horn emits a loud beep or quacking sound.
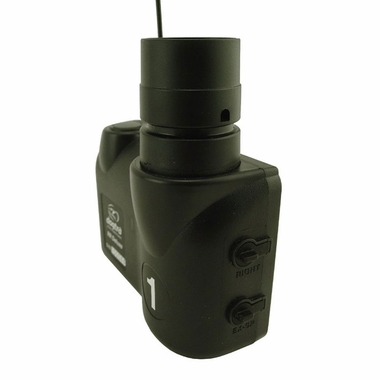
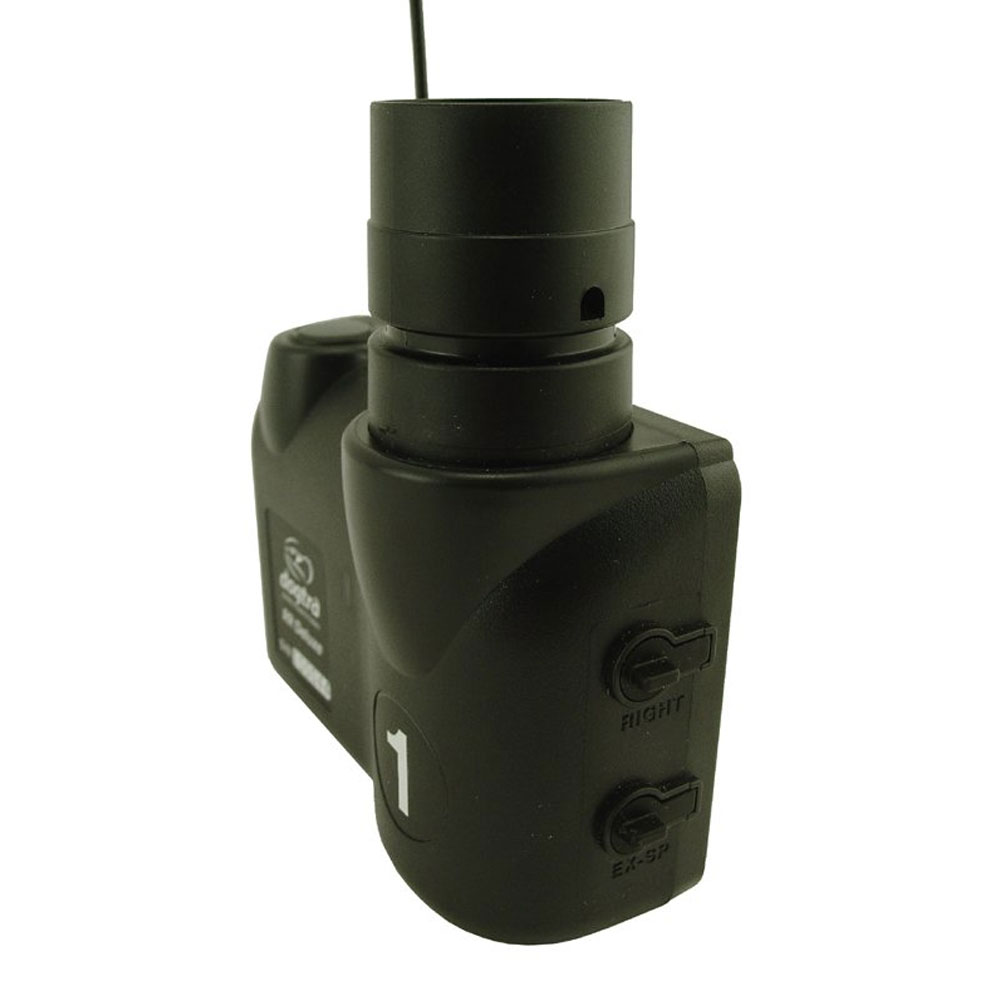
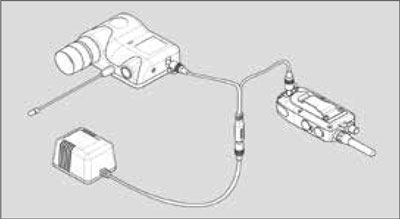
Figure 7. Using the external speaker (optional)
Plug the external speaker cable to the external speaker jack located on the bottom right side of a receiver. The external speaker cable can be purchased separately.
Press the transmitter's Beeper button or Duck Call button. The external speaker should emit a loud beep or quack sound.
Dogtra QL/PL SPRING STRENGTH SETTINGS
Figure 8. Positioned for high launch
The bird launcher is shipped with the springs adjusted in the bottom setting. This setting gives you the high launch. Turning clockwise will move the springs down for a higher launch; the very bottom being the highest.
Figure 9. Positioned for low launch
Turning counter-clockwise will move the springs up for a low and quiet launch; the very top being the lowest.
CHARGING THE BATTERY
The Dogtra RR DELUXE uses a nickel metal hydride battery. Recharge the unit if the indicator light is red, the light does not come on, or the system will not stay on when any button is pressed.
NOTE 1: Only use Dogtra-approved batteries, chargers, and accessories for your Dogtra systems. This will prevent any damage that can be incurred from attempting to use a different charger.
NOTE 2: The unit has a partial charge when it leaves the Dogtra facility. Upon receipt of the system, be sure to give it a full 14-hour initial charge before the first use away from any flammable substances.
NOTE 3: When a charger is not in use, disconnect it from the power source. Fully charge the batteries if the unit is to be stored without use for a period of 3 months or more.
Follow the steps below to charge your system:
- Open the rubber plugs on the battery charging receptacles and plug in the charging cable.
- Plug the charger into a 120-volt wall outlet or, if using the auto charger, plug into a cigarette lighter only for lithium polymer batteries (use a 220 volt European charger for Europe). All indicator lights should glow red when properly plugged in and the unit will automatically shut off during the charging process. You will need to turn the unit on again before use once the unit is fully charged and unplugged from the battery cable.
- The nickel metal hydride battery is fully charged within 14 hours. The lights will stay red during the charging process and turn green once the unit is fully charged.
- After charging, cover the battery charging receptacles with the rubber plugs.
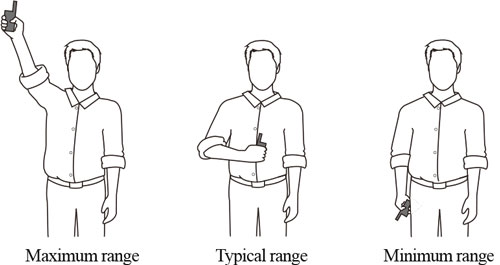
MAXIMIZING THE DISTANCE
The Dogtra RR DELUXE has a range of 1 mile. Depending on the way you use your transmitter, the transmitter range may vary.
To get the greatest range, hold the transmitter away from your body and avoid touching the antenna. Keep your unit properly charged for maximum signal strength.
MAINTENANCE
Basic Maintenance
Make sure the rubber charging cap is securely in place. After each training session, carefully inspect the unit for any missing parts or damage to the casing. Damaged or broken casing may affect the waterproof guarantee on the unit. After confirming that there is no damage to the casing, rinse the product and clean out any dirt or debris.
Storage Maintenance
The RR DELUXE should be fully charged before storing for extended periods. While in storage, the unit should be given a full charge once a month and before the first use. Store the units in room temperature. Do not keep the units exposed to extreme climates.
Troubleshooting
If the unit is malfunctioning, please refer to the Troubleshooting Guide before sending it to Dogtra for service. If you have any questions or concerns, you may email them to info@dogtra.com, or call customer service at (888) 811-9111.
Customer Reviews
Questions and Answers
 Dogtra STB Training & Beeper Collar System - Hawk VersionReg price: $168.97 Dogtra STB Training & Beeper Collar System - Hawk VersionReg price: $168.97Sale price: $129.98 |  Dogtra RR Deluxe Remote Release Bird Launchers 1 MileReg price: $612.59 Dogtra RR Deluxe Remote Release Bird Launchers 1 MileReg price: $612.59Sale price: $471.23 |  Dogtra 1900S E-Collar Remote Training System 3/4 Mile - 1 DogReg price: $506.97 Dogtra 1900S E-Collar Remote Training System 3/4 Mile - 1 DogReg price: $506.97Sale price: $389.98 |  Dogtra 1900S E-Collar Remote Training System 1 Mile Up To 35 lbs Dog - BlackReg price: $633.72 Dogtra 1900S E-Collar Remote Training System 1 Mile Up To 35 lbs Dog - BlackReg price: $633.72Sale price: $487.48 |